Showing posts with label fabric. Show all posts

Sunday, May 27, 2012

The Finished Product: How I threw The Baby Shower

Hello Again!

So often it is easy to get focused on one individual project:  in this situation, I had been working on stuff for the Baby Shower for so many weeks that I am very proud to show off the finished product!  I had never done a baby shower before, and really had never done ANYTHING that I had decided to do, so it was all learn-as-you-go, and make mistakes, and research, and try and try again.  I hope this post will help some other fortunate (but in an I'm-new-to-this-and-lost-kind-of-way unfortunate) soul out there who wants to throw an amazing shower without any experience.  Most of what I ended up doing stemmed from countless hours on Pinterest, reading other blogs about how-to plan a baby shower, and looking at magazines when I had a few moments.  One of the biggest suggestions I could give to any one planning a baby shower is Ask the Mommy to Be what she likes!  I picked what I liked, and then asked her what she thought!  She found quite a few things that went well with what I was thinking, and in the end, I was able to do everything she wanted (and more, I hope!)!  There are quite a few different decorating things I did here, and quite a few different tutorials I followed, so I will try to point them out as I go along!

Welcome!  How to make your house stand out


The first thing people encountered as they arrived at the shower were the balloons on my mailbox, letting them know they were in the right place.  This is something that I had seen done, but never knew how to do it.  It was very simple:  I took a length of ribbon approximately 1 yard in length (choose ribbon that is only 1/2 inch wide, or it won't tie well, also preferably without a satin finish), a few balloons that I blew up myself, nothing special.  You do not actually need helium balloons to do this, as the pressure you will put on them by the way you tie them will make them sit well.  Once you have blown your balloons up, tie them to the ribbon (without cutting the ribbon) approximately 6 inches apart.  This is easiest done by tying the little loop where you want it, and then slipping it over the balloon base and tightening it quickly.  Once you have as many balloons on each ribbon as you would like (I did 6 per ribbon), tie them to your mailbox.  And voila!


Come on in!  Door Decoration for the Shower

Next up was the homemade rattle I made.  This provided a little difficult to hang, though I just used some clear Scotch Brand tape laid neatly over the ribbon on the back, and used that to provide the tension it needed.  The tutorial for this can be found on my blog at http://beaufleurs.blogspot.com/2012/04/diy-easy-and-elegant-baby-rattle.html .


Pretty Pretty Princess:  Decorations for the Adult Princess

Inside the house, I had followed some inspiration I had seen, and hung reams of tulle from the arches in my home.  This was pretty easy to do, though it took a little figuring out.  I was very concerned that I did not want to damage my walls, but I still wanted to achieve the Pretty-Princess look.  Because the tulle is not heavy at all, I found a pretty ingenious solution.  When hanging things from the ceiling, you cannot use a normal hook, as they will probably fall off.  I used the Command Strips Brand Cord Organizer Hooks, and tied a little ribbon around the tulle with a little bow.  The ribbon then laced through the cord organizer hooks, and they hung very nicely!


I made pomander balls (I learned the official name for them while researching how to do them) from the tutorial located on Martha Stewart's craft website ( http://www.marthastewart.com/how-to/tissue-paper-pom-poms-how-to ).  I used a mix of tissue paper poms and fabric and flower pomander balls.  The flower pomander balls were very simple to make, and I will post a tutorial on them very shortly!  The fabric pomander balls were simple, but certainly took much longer to make.  For a great tutorial on these, check out http://www.oncewed.com/24140/wedding-blog/diy-wedding/diy-fabric-poms/  .  This is the absolute best tutorial I found out there!  You can see my handiwork below:


The really nice thing about the pomander balls is that they can be used after the shower as decorations in the baby's nursery!

Thank you for the gifts!  How to display the guest's gifts

Given that I did not have much tablespace available, I wanted to find a really unique way to display/collect the gifts. I decided to go out antiquing (one of my absolute FAVORITE activities) to find an antique victorian baby cradle.  The cradle I ended up finding was a full size cradle, in excellent condition, for a total STEAL!  I then cut out cute little tags out of two different color purple cardstock, and tied them with a sheer chiffon ribbon on to the cradle.  I used a thin line purple Sharpie to write the word 'gifts' on to the tags, and it left no confusion, and added a lot of character!


Don't mind my mess:  Mess Hiding Tulle 'Skirt'

My next favorite finish on the baby shower decorations was the tulle 'skirt' that I placed around the wood block serving stand that I have.  I noticed that it is not always feasible to 'hide' all of my things when cleaning for the baby shower, so I decided to use tulle to simply mask my things (and keep them out of sight of the little kiddies hands).  This skirt was actually really easy to make (I should have taken pictures as I went along).  Simply cut a length of 1/2 inch wide ribbon approximately a foot longer than you will need for your table.  Tie the ribbon loosely to two chairs, and scoot them apart until the ribbon is taught.  Then, take two (or however many you would like) 25 yard spools of decorator's tulle (the tulle on these spools is approximately 6 or 8 inches wide) in whatever your shower colors are.  Mine were lavender and pearl, so I found a creamy ivory tulle and a soft lavender tulle.  Cut your first length double the length that you will need for your table (from where the ribbon will sit to the floor), plus about two inches.  Then continue to cut lengths (keeping both of your colors separate), until you have about 50 to start.  Next, you simply fold your length in half, and the reach the ends through the loop created at the middle around the ribbon.  Just keep doing this and alternating colors until you are done!  I think it was pretty easy, and turned out very well.  It is a little time consuming (about 2 hours) though, so make sure you plan for that!  I then used double sided tape in just a few spots to stick it to my wood block.


Party Favors: Easy Sugar Scrub

One of the things I found is that there are SO SO many different favor ideas out there.  Since our shower was really very DIY meets Crafty Goddess meets Elegant Princess, I wanted to do something that would reflect all three.  I ended up deciding to make home-made sugar scrubs, in 5 different flavors: peppermint, lemon, sweet orange, vanilla and rose.  It was very simple:  I bought almond oil at my local health food stores (I would suggest the NOW brand), bought 5 different essential oils (all also by NOW, also at the health food store) and bought a 25 lb bag of regular sugar from Wally World.  I used the following recipe:

Homemade Sugar Scrub


1/2 cup carrier oil of your choice (I used organic almond oil, you can also use olive oil, though don't use EVOO as it will smell like olives.  Coconut oil felt the absolute best on my skin, but it hardened after it sat and cooled)
1 tsp lemon juice
1 cups sugar table sugar works just fine; if you want a more harsh scrub, you can use brown sugar
5 drops essential oil of your choice

Mix it all together and voila!  Remember, the above are just suggestions:  you can add more sugar or oil as you need to get it to whatever consistency you want (I liked it a little bit more runny, just so that it would pour well into and out of the jars).  Also, depending on the scent of oil you choose, you may need more drops of essential oil to be able to smell it (I found the vanilla was the hardest to smell, so I had to keep adding more and more, while the lemon was very easy to smell from the get go).  I then packaged them in mason jars I bought at Wally World.  I did not like any of the Kerr or Ball jars that I found, so I actually chose the plain Wally World brand in a pint size.  Those were a little large in the end, but I didn't mind!  I then tied a sweet little ribbon on them, with a tag I cut out on my cricut.  I chose a different color tag for each flavor (pink for rose, yellow for lemon, green for mint, etc.).  I wrote the recipe for the scrub on the tags, and attached a little charm I found at Michael's in the shape of a heart saying 'It's a Girl!'.  They were a pretty big hit!


What everyone came for:  the Food!


One of the main pieces of advice I found for Baby Shower was the the food will determine the success of the shower!  Because our shower was at 11:00 a.m., I wanted to go with a light brunch style food theme.  I have always wanted to have a tasting party, and I figured that this was a perfect opportunity.  In order to promote conversation and keep it light and fun, you don't really want to have a sit-down meal, or even large portions.  A tasting party was the perfect solution.  I made finger foods, and put small portions of delectable desserts in small glassware (identical plastic-ware can be found at Party City), and provided itty-bitty tasting spoons for ease of eating.  Our menu was as follows:


I didn't make the cake:  it was a raspberry cream cake from a local bakery, with fresh cut flowers on top.  I also bought gluten-free cupcakes from my local gluten-free bakery, in three different flavors that I absolutely love!  (Most of the recipes were altered to make them gluten-free, because, sadly, I can't eat gluten anymore).


We had deviled eggs, and truffles from our local tea house that stocks home-made truffles.  We also had a banana cream delight dessert ( http://media.pier1.com/img/pier1com/pier1studio/tastingparty/banana-cream-delight.pdf ), and peanut butter bars ( http://www.sixsistersstuff.com/2012/03/easy-no-bake-peanut-butter-bars.html ).


We had fresh fruit salad, gluten free italian pasta salad ( http://www.glutenfreespinner.com/2010/06/italian-pasta-salad.html ), flourless dark chocolate cookies ( http://www.divine-baking.com/2011/04/deep-dark-chocolate-cookies.html#more ), and one of my favorite desserts:


Nummy Pistachio and Oreo Pudding

1 pack of Oreo Cookies (or two packs of Glutino Gluten Free Oreos)
2 packages of Jello Pistachio Pudding Mix
1 container of vanilla ice cream (quart was good), melted
1 cup milk
Homemade whipped cream, as needed

§         Place two rows of broken up Oreos on the bottom of the tray
§         Mix milk, pudding mix, and melted vanilla ice cream until pourable
§         Dump over the Oreos and place in the fridge for one hour
§         Take mixture out of fridge and cover with whipped cream and last row of Oreos
§         Chill in fridge for four hours


In the end, I was very very happy with how my table turned out!  I made the banner on my cricut from the same colors of cardstock that I used for the 'gifts' tags, and made the bows from the same tulle that I used to make the table 'skirt'.

Of Course, the Drinks!


As a brunch shower, we really didn't need alcoholic drinks.  (I also didn't really want to make the mommy-to-be feel left out, so we decided to make the majority of the drinks virgin.  We made a mock champagne ( http://allrecipes.com/recipe/mock-champagne-2/detail.aspx ), and a virgin mojito ( http://www.ourbestbites.com/2010/07/lime-mint-spritzer-aka-the-virgin-mojito/ ) recipe.  We also had ice water and strawberry lemonade, both with fresh strawberries and fresh cut lemon slices to add that extra kick.  I cleaned and cut the strawberries the night before, and then froze them in a glass container in my freezer and used them as 'ice' the next day.  They actually kept the drinks very very cold throughout the whole morning and well into the evening.


A parting favorite:  Homemade Lollipops

My final favorite item was a collection of homemade lollipops I ordered from a friend I met at a craft fair.  She made six different flavors of lollipops, in three different colors (a creamy white, a dark purple, and a lavender purple), all in the shape of a teddy bear.  I tied them with matching ribbons, and put them out for people to take with the favors.  They weren't really necessary, but they were fun for the kids, and a cute little add-on.  Plus, they were delicious!


I have to admit, I was kind of sad to see it end.  It was all a lot of hard work, a TON of fun!  I would love to do it again sometime!

Let me know what you think, or if you have any questions, or if there is anything I can do to help you!

Yours in Beauty and Love,
Marijke

Saturday, April 28, 2012

DIY Easy Headband Storage

Hello again!  

As I have had three craft fair booths every Saturday for the last three weekends, I am a little pooped!  Boy, oh, boy!  Crafting CAN get busy!  Anyways, because of that, I figured that I would add on to a previous post, and post a tutorial on Easy Headband Storage!  I made mine to match the ones in my previous post, so that they can all sit prettily together in my craft room!
What you'll need:

A ribbon of your choosing.  I chose a black and white ribbon reminiscent of the old french style.  I like to call it my marie antoinette ribbon!  It is an inch wide, which is just perfect for my flowers.  It also matched my reupholstered sewing table stool, and the memo board I made to match.  You will need to make sure your ribbon is wide enough for the clip to get a grip on, and that you buy enough for the lengths you want.  I bought two spools to start, and have since bought 4 more (though I have them on two walls now).  Also, a hardier ribbon, perhaps of cotton or a blend, is much better than those beautiful sheer ribbons.  Clips will tend to pull on the sheer ones and leave unsightly marks.

Earring hoops.  These can be found at any hobby shop (I use Hobby Lobby), in the jewelry making section.  You can get any shape you like; I personally love the teardrop shape.  You will need to purchase enough for the amount of ribbons you want to make, one per ribbon.

Sewing machine, matching thread, scissors, nails and a hammer.  If you would like, there is minimal sewing, so you can hand sew them.  I personally find it much easier to use my machine. 


Now you are ready to start!

Cut the ribbon to your desired lengths.  This is one of the more important parts.  You will want to hold your ribbon up in the spot you would like to hang it, and determine the length you want.  Allow approximately an extra inch on each end, and an extra half inch for each headband loop, so an extra two inches total, plus whatever you will add on for the headbands.


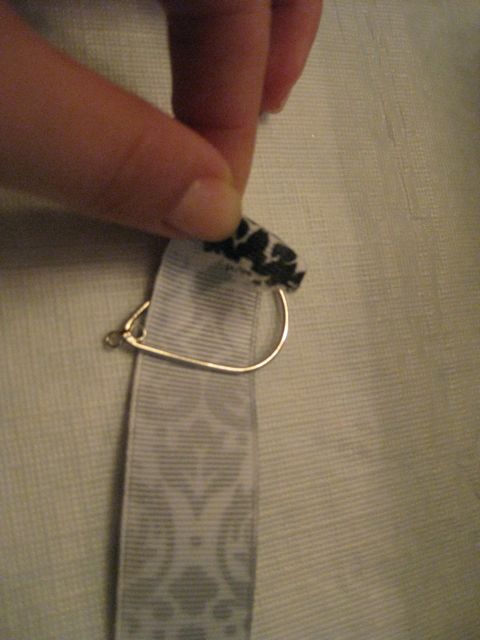
Place the ribbon through the earring hoop:  sew.  This step takes careful hands!  Simply pull your ribbon through your hoop.  Then, to create a nice, clean edge, fold the very end over on itself, and tuck it against the backside of the ribbon.  Your earring hoop should now be securely through the ribbon.  Simply run this through the machine, a single straight stitch (making sure that you also stitch through the folded under piece).  The only difficulty with this step is getting the folded under portion to stay folded under as you run it through the machine.  I also found that it runs through the machine easier if you turn the hoop to the side while you sew, with the straight edge running parallel to the sewing foot.


Make your Loop.  This is the part that you can play around with, staggering them to make them hang well on your wall.  Simply decide where you would like your first loop, and fold your ribbon over.


Now, simply sew a straight stitch across the loop.  I did mine a good half inch in, but I found that it did not hold the headbands in as tightly as they needed.  I would suggest stitching only a quarter of an inch in, which will give you a tighter loop.


Simply continue folding and stitching your loops.  Given that I was doing a few strands of these, I chose to stagger my loops, so that headbands would not hit each other, and I would be able to put the strands closer together.


Hem the bottom edge.  This is not a necessary step, but I find it makes it just a little nicer.  Simply do the same thing as you did at the top, without the earring hoop.  Just fold the bottom edge in on itself, and fold it over once more.  Run a straight stitch across it, and voila!  You are done!


You are almost done!


Hammer the nail in, hang your earring, and you are done!  If you are hanging more than one, I thought it worthwhile to use a level.  Simply use your level against the wall, mark your distances, and hammer the nails in!  I left a four inch space between each of ours, to allow for bigger headbands and flowers, but it is completely up to you!  Best of luck!  Let me know how it goes, and feel free to ask any questions you may have!


Yours in Beauty and Love,
Marijke
Monday, September 5, 2011

DIY Wall Art - Fabric Panels

Okay... all showered... now to BLOG!  Excuse my excitement, I have just been so excited, so I had to force myself to stop and join the world of the clean and presentable...

For quite a while I have been looking for the perfect piece of artwork to fill up my very blank wall in my guest bedroom... it was an exercise in futility.  If I found something, it was $300+... or if I found something in my price range, it was either too small, or scuffed and banged up beyond repair (at discount stores, etc.).  Finally, while stumbling my way across the interwebs, I found an adorable idea on Pinterest... The Idea .  I figured, if I shopped the sales correctly, I could get all of the materials for under $100.

So, I waited for Joann's sale on home decor fabric, and went when it was 50% off.  I purchased the other materials on sale at Michael's.

Materials Needed:
Fabric (preferable home decor fabric) in coordinating patterns and colors. I purchased 1 yard for my big frame, and that was enough to cover an additional little frame.  For the others, I purchased amounts based on how much I liked the fabric/how much of it I wanted to showcase.  I purchased between 1/3 yd, 1/2 yd, and 2/3 yard of my fabrics.  I would suggest not purchasing 1/3 yd unless you are doing really small frames... it was a stretch to try and get it to cover a frame as well as I wanted it to.  In general, you will want an excess of six inches each direction out past your frame, which will translate to an excess of 3 inches each side.  EX: If you want to cover an 8x10 frame, you will want a piece of fabric AT LEAST 14x16 (go bigger if you can, it will only make it easier).
  *NOTE:  you can also do it with just one fabric, perhaps a rather patterned one, and it will look AWESOME.  I just have fabric ADD so I wanted quite a few


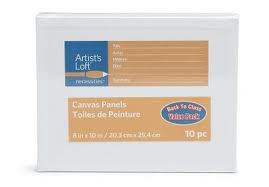
Stretched Canvas squares/frames in the sizes you would like.  I personally wanted a very large wall design, so I have  almost every option... 4x4, 8x10, 9x12, 11x14, 16x20, and 24x36.  You can also do this project by just purchasing the connecting wood frame pieces from Michael's, that artists use to stretch their own canvas, but I am semi-lazy so I decided to just get the canvas covered ones already.  I also felt it would give softer edges when the fabric was stretched over it.  Also, when you are purchasing, pay attention to the width of the canvas... I stuck with all 3/4 inch wide canvas.  I would suggest keeping it uniform, as it lays nice and flat against the wall then, but of course, it is your project!  You don't need to be super precise, just check that they all seem to be about even with each other, no matter the actual size of the frame.  If you are daring, (or don't care, like me!) you can lay your frames out in a pattern on the floor at Michael's, to make sure you have the design you want and enough of each size frame you purchase.  I purchased the Artist's Loft canvas value packs (packs of 2) for most of my frames, from Michael's.


Staple Gun and staples.  I used a staple gun I had purchase at Home Depot (just the cheap, light duty one) for a previous project.  It worked just fine, though I did need to ask my husband to run out for more staples, because I went through two boxes.  He brought home six.  :-)

A hammer.  Because, if you are like me, not all staples will go in properly, therefore you will need to go over them afterwards with a
hammer to ensure they are seated fully.


Placement
Once you have all of your materials together, you have done the hard part!  Once I was home with all of my materials, I laid my frames out on my living room floor and decided how I wanted them to fit together.  (I actually also did this on the floor at Michael's, to make sure I had enough of each size I wanted to use.)  Then, lay your fabrics on top, just to keep your mind organized, and play around with sizes and colors until you have found a mix you love.


(This picture was post-stapling, sorry!  But don't worry, I had mine laid out and the fabrics just haphazardly thrown on them, for a mental idea.)

Fabric Preparation
Next, iron your fabrics, so that you do not have wrinkles/ugly lines throughout your design.  Once it is ironed to your liking (I despise ironing, so I didn't worry too much when deep set lines wouldn't come out), lay the piece of fabric on a flat surface.  Decide which part of the fabric you would like to highlight (this is more for a really patterned piece:  perhaps you like one flower more than the other, etc.), and place your canvas frame on top.  Cut around the frame, leaving as much excess as you like (I like about three to four inches, for easy holding, but no more than 4 because then it gets in the way for stapling.  It is all personal preference).  Then, if you haven't already, turn your fabric right side (patterned or colored side) down on the table.  Place your canvas right side down on top of it (you should be looking at the back side of both the fabric and the canvas.

Stapling
Then... start stapling!  This is much like reupholstering something... you simply make sure your canvas in centered on your fabric, then fold in the edges over to the back side of the canvas square.  Put one staple in the middle of each side, making sure to pull your fabric as taught as you can, or as you like it, before stapling.  Then, starting in the middle and working your way out, place staples approximately 1/2 inch to an inch apart.  Stop before the corners on each side.  I also found, to avoid wrinkling, make sure you are not only pulling the fabric taught towards you, but also away from the center of the frame (meaning pull towards you but also out towards the corners.)


Corners
Once you have stapled all four sides, you only have the corners left.  I did mine my own way, but if you have a way you prefer, of course, do that.  I picked a direction (for me, generally the shorter legs of the frame, or the 8 side of an 8x10) and stapled all the way to the edge on that direction, getting all the way down to within an centimeter from the edge.  I then grabbed the fabric at the corner, on the angle, and stretched that inwards and stapled that (it makes a kind of creased pull over the corner, but shouldn't be too obvious).  I then grabbed the remaining loose fabric (which should now be on the 10 side of the 8x10) and folded it in, much like wrapping a present, with the nice clean line.  I then stapled that in place.  You will end up with a corner that looks nicely wrapped, and will have the wrapping on the same sides around the whole frame (which will look more
uniform in the end.)


It gets a little messier with the smaller 4x4 frames... in that case, I tried to do the same thing, but really just did the best I could with the same method.  Don't forget to smack any loose staples with your hammer!


Hanging your Masterpiece
Once you have finished covering all of your canvas frames, it is time to start hanging!  The nice thing about this project is that you don't have to deal with actual picture hanging hardware.  You just need to get your nails level and in the right spot.  My husband took pity on me when he saw me trying to hang a frame almost as tall as I am, so he came and helped for this part.  We started by hanging our corner piece, the biggest frame.  I used two nails for each frame (even the tiniest ones) to give extra stability.  The trick was to find the spot for the first nail, and then level the second nail off of that one.  They don't need to be in any specific spot on the frame:  with two level nails, it is nice because you can move the frame laterally a few inches either way and not have to worry about stability or anything.  It should just slide side to side for easy positioning, and stay level no matter what.

From there, you can either very lightly draw a line with pencil on your wall level from the top of the corner piece, and measure down from that the width you need to hang your next piece (the width of the top piece of wood that will be resting on the nails), or you can just eyeball it and figure out your nail placement for each frame individually.  Just have fun with it!


An hour and a half later (yes, it takes a while when both parties are perfectionists!).... we were putting the last one in!  (Oh, okay, HE was putting in the last one ;-)


Our finished project:


Well, I hope you enjoyed my first ever craft tutorial!  I had a ton of fun doing this project, and hope you do too! If there was anything you have more questions about, or that could be clearer, please let me know!

I would love to see what you come up with!

Yours in Beauty and Love,
Marijke