Okay... all showered... now to BLOG! Excuse my excitement, I have just been so excited, so I had to force myself to stop and join the world of the clean and presentable...
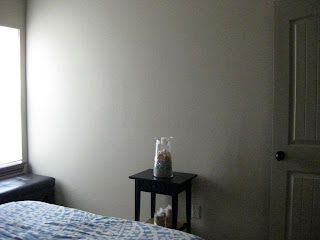 For quite a while I have been looking for the perfect piece of artwork to fill up my very blank wall in my guest bedroom... it was an exercise in futility. If I found something, it was $300+... or if I found something in my price range, it was either too small, or scuffed and banged up beyond repair (at discount stores, etc.). Finally, while stumbling my way across the interwebs, I found an adorable idea on Pinterest... The Idea . I figured, if I shopped the sales correctly, I could get all of the materials for under $100.
So, I waited for Joann's sale on home decor fabric, and went when it was 50% off. I purchased the other materials on sale at Michael's.
Materials Needed:
Fabric (preferable home decor fabric) in coordinating patterns and colors. I purchased 1 yard for my big frame, and that was enough to cover an additional little frame. For the others, I purchased amounts based on how much I liked the fabric/how much of it I wanted to showcase. I purchased between 1/3 yd, 1/2 yd, and 2/3 yard of my fabrics. I would suggest not purchasing 1/3 yd unless you are doing really small frames... it was a stretch to try and get it to cover a frame as well as I wanted it to. In general, you will want an excess of six inches each direction out past your frame, which will translate to an excess of 3 inches each side. EX: If you want to cover an 8x10 frame, you will want a piece of fabric AT LEAST 14x16 (go bigger if you can, it will only make it easier).
*NOTE: you can also do it with just one fabric, perhaps a rather patterned one, and it will look AWESOME. I just have fabric ADD so I wanted quite a few
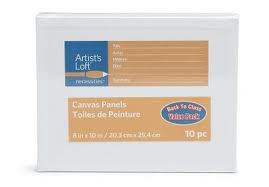
Stretched Canvas squares/frames in the sizes you would like. I personally wanted a very large wall design, so I have almost every option... 4x4, 8x10, 9x12, 11x14, 16x20, and 24x36. You can also do this project by just purchasing the connecting wood frame pieces from Michael's, that artists use to stretch their own canvas, but I am semi-lazy so I decided to just get the canvas covered ones already. I also felt it would give softer edges when the fabric was stretched over it. Also, when you are purchasing, pay attention to the width of the canvas... I stuck with all 3/4 inch wide canvas. I would suggest keeping it uniform, as it lays nice and flat against the wall then, but of course, it is your project! You don't need to be super precise, just check that they all seem to be about even with each other, no matter the actual size of the frame. If you are daring, (or don't care, like me!) you can lay your frames out in a pattern on the floor at Michael's, to make sure you have the design you want and enough of each size frame you purchase. I purchased the Artist's Loft canvas value packs (packs of 2) for most of my frames, from Michael's.
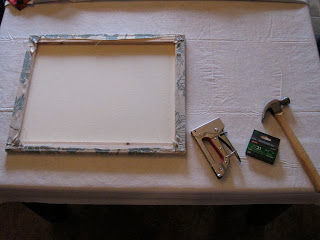 Staple Gun and staples. I used a staple gun I had purchase at Home Depot (just the cheap, light duty one) for a previous project. It worked just fine, though I did need to ask my husband to run out for more staples, because I went through two boxes. He brought home six. :-)
A hammer. Because, if you are like me, not all staples will go in properly, therefore you will need to go over them afterwards with a
hammer to ensure they are seated fully.
Placement
Once you have all of your materials together, you have done the hard part! Once I was home with all of my materials, I laid my frames out on my living room floor and decided how I wanted them to fit together. (I actually also did this on the floor at Michael's, to make sure I had enough of each size I wanted to use.) Then, lay your fabrics on top, just to keep your mind organized, and play around with sizes and colors until you have found a mix you love.
(This picture was post-stapling, sorry! But don't worry, I had mine laid out and the fabrics just haphazardly thrown on them, for a mental idea.)
Fabric Preparation
Next, iron your fabrics, so that you do not have wrinkles/ugly lines throughout your design. Once it is ironed to your liking (I despise ironing, so I didn't worry too much when deep set lines wouldn't come out), lay the piece of fabric on a flat surface. Decide which part of the fabric you would like to highlight (this is more for a really patterned piece: perhaps you like one flower more than the other, etc.), and place your canvas frame on top. Cut around the frame, leaving as much excess as you like (I like about three to four inches, for easy holding, but no more than 4 because then it gets in the way for stapling. It is all personal preference). Then, if you haven't already, turn your fabric right side (patterned or colored side) down on the table. Place your canvas right side down on top of it (you should be looking at the back side of both the fabric and the canvas.
Stapling
Then... start stapling! This is much like reupholstering something... you simply make sure your canvas in centered on your fabric, then fold in the edges over to the back side of the canvas square. Put one staple in the middle of each side, making sure to pull your fabric as taught as you can, or as you like it, before stapling. Then, starting in the middle and working your way out, place staples approximately 1/2 inch to an inch apart. Stop before the corners on each side. I also found, to avoid wrinkling, make sure you are not only pulling the fabric taught towards you, but also away from the center of the frame (meaning pull towards you but also out towards the corners.)
Corners
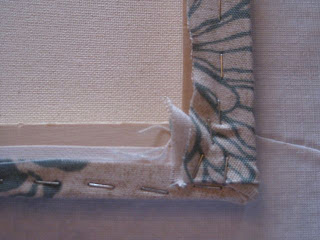
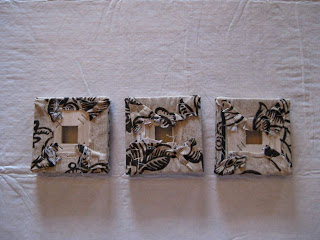 Once you have stapled all four sides, you only have the corners left. I did mine my own way, but if you have a way you prefer, of course, do that. I picked a direction (for me, generally the shorter legs of the frame, or the 8 side of an 8x10) and stapled all the way to the edge on that direction, getting all the way down to within an centimeter from the edge. I then grabbed the fabric at the corner, on the angle, and stretched that inwards and stapled that (it makes a kind of creased pull over the corner, but shouldn't be too obvious). I then grabbed the remaining loose fabric (which should now be on the 10 side of the 8x10) and folded it in, much like wrapping a present, with the nice clean line. I then stapled that in place. You will end up with a corner that looks nicely wrapped, and will have the wrapping on the same sides around the whole frame (which will look more
uniform in the end.)
It gets a little messier with the smaller 4x4 frames... in that case, I tried to do the same thing, but really just did the best I could with the same method. Don't forget to smack any loose staples with your hammer!
Hanging your Masterpiece
 Once you have finished covering all of your canvas frames, it is time to start hanging! The nice thing about this project is that you don't have to deal with actual picture hanging hardware. You just need to get your nails level and in the right spot. My husband took pity on me when he saw me trying to hang a frame almost as tall as I am, so he came and helped for this part. We started by hanging our corner piece, the biggest frame. I used two nails for each frame (even the tiniest ones) to give extra stability. The trick was to find the spot for the first nail, and then level the second nail off of that one. They don't need to be in any specific spot on the frame: with two level nails, it is nice because you can move the frame laterally a few inches either way and not have to worry about stability or anything. It should just slide side to side for easy positioning, and stay level no matter what.
From there, you can either very lightly draw a line with pencil on your wall level from the top of the corner piece, and measure down from that the width you need to hang your next piece (the width of the top piece of wood that will be resting on the nails), or you can just eyeball it and figure out your nail placement for each frame individually. Just have fun with it!
An hour and a half later (yes, it takes a while when both parties are perfectionists!).... we were putting the last one in! (Oh, okay, HE was putting in the last one ;-)
Our finished project:
Well, I hope you enjoyed my first ever craft tutorial! I had a ton of fun doing this project, and hope you do too! If there was anything you have more questions about, or that could be clearer, please let me know!
I would love to see what you come up with!
Yours in Beauty and Love,
Marijke



No comments:
Post a Comment