What you'll need:
A ribbon of your choosing. I chose a black and white ribbon reminiscent of the old french style. I like to call it my marie antoinette ribbon! It is an inch wide, which is just perfect for my flowers. It also matched my reupholstered sewing table stool, and the memo board I made to match. You will need to make sure your ribbon is wide enough for the clip to get a grip on, and that you buy enough for the lengths you want. I bought two spools to start, and have since bought 4 more (though I have them on two walls now). Also, a hardier ribbon, perhaps of cotton or a blend, is much better than those beautiful sheer ribbons. Clips will tend to pull on the sheer ones and leave unsightly marks.
Earring hoops. These can be found at any hobby shop (I use Hobby Lobby), in the jewelry making section. You can get any shape you like; I personally love the teardrop shape. You will need to purchase enough for the amount of ribbons you want to make, one per ribbon.
Sewing machine, matching thread, scissors, nails and a hammer. If you would like, there is minimal sewing, so you can hand sew them. I personally find it much easier to use my machine.

Now you are ready to start!
Cut the ribbon to your desired lengths. This is one of the more important parts. You will want to hold your ribbon up in the spot you would like to hang it, and determine the length you want. Allow approximately an extra inch on each end, and an extra half inch for each headband loop, so an extra two inches total, plus whatever you will add on for the headbands.

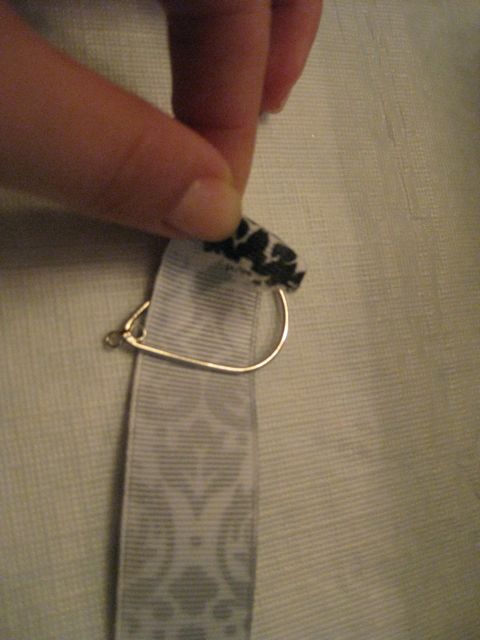
Place the ribbon through the earring hoop: sew. This step takes careful hands! Simply pull your ribbon through your hoop. Then, to create a nice, clean edge, fold the very end over on itself, and tuck it against the backside of the ribbon. Your earring hoop should now be securely through the ribbon. Simply run this through the machine, a single straight stitch (making sure that you also stitch through the folded under piece). The only difficulty with this step is getting the folded under portion to stay folded under as you run it through the machine. I also found that it runs through the machine easier if you turn the hoop to the side while you sew, with the straight edge running parallel to the sewing foot.


Simply continue folding and stitching your loops. Given that I was doing a few strands of these, I chose to stagger my loops, so that headbands would not hit each other, and I would be able to put the strands closer together.

Hem the bottom edge. This is not a necessary step, but I find it makes it just a little nicer. Simply do the same thing as you did at the top, without the earring hoop. Just fold the bottom edge in on itself, and fold it over once more. Run a straight stitch across it, and voila! You are done!


Hammer the nail in, hang your earring, and you are done! If you are hanging more than one, I thought it worthwhile to use a level. Simply use your level against the wall, mark your distances, and hammer the nails in! I left a four inch space between each of ours, to allow for bigger headbands and flowers, but it is completely up to you! Best of luck! Let me know how it goes, and feel free to ask any questions you may have!


Yours in Beauty and Love,
Marijke
Thanks for the idea, I need that!!!Bye
ReplyDeleteVery cute idea, and it will keep them nice and new.
ReplyDeleteLovely idea!
DeleteStopping by the say hello from the Interactive blogging team
The Dorothy Days (team captain)